Difference between revisions of "Sims 3:Basic Mask Editing"
(→Part I: Creating the Color Channels) |
(→Pattern D) |
||
| Line 135: | Line 135: | ||
Even EA-made masks use large blocks/lines of color as you can see with these child ankle socks (pictured right). | Even EA-made masks use large blocks/lines of color as you can see with these child ankle socks (pictured right). | ||
| − | '''How exact and precise you have to be really depends on what you're trying to do...so you may have to experiment with different techniques before you get it | + | '''How exact and precise you have to be really depends on what you're trying to do...so you may have to experiment with different techniques before you get it to look perfect.''' |
<br clear="all"> | <br clear="all"> | ||
Revision as of 06:25, 20 July 2009
Contents |
RGB Masks
Masks can be thought of as the "painter's tape" of the game. The game uses masks to map out separate colorable regions in Create A Style. These regions allow for multicolored/patterned parts on your CAS part and/or object.
What This Tutorial Will Do
- Teach you how to make color masks for the Sims 3.
What This Tutorial Will Not Do
- Make new meshes or patterns for the Sims 3.
- Create new base textures or add transparency.
-
 Take a look at Creating A New Base Texture for that.
- Create a CAS part stencil
-
 Take a look at Creating Custom Clothing Stencils for that.
Difficulty
I've made this tutorial for beginners and first timers, however, some basic knowledge on how to use your imaging program is needed.
What You'll Need
- Adobe Photoshop (purchase) or GIMP 2.0 (free)
- Delphy's CAS Texture Unitool
- DDS Plug-in for Photoshop or GIMP
(I'll be using Photoshop 7.0, so if you're using GIMP the screen shots will be different but the concept is the same.)
The Anatomy of the RGB Mask
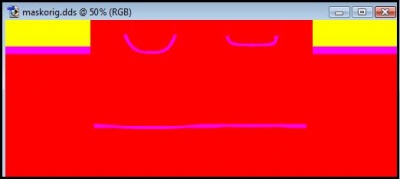
Before you dive in and create your new mask, it's best to get familiar with how these things work.So, let's take this t-shirt and break down the different parts of its mask.
Channels
Like patterns, the game uses color channels to break up the CAS part into different colorable regions. The red channel is almost always used as the main background color whereas the green and blue channels are used to define smaller regions and detail. Although it's not pictured, the alpha channel can also be used to add a fourth recolorable zone.
Defining Colors
To create the color channels you could edit directly on the channels themselves. However, by painting with certain colors, you can create the channels automatically.
- The first color you use is red (255R/0G/0B). Notice how red is the predominate color, that's because it maps the main color of the t-shirt.
- The second color you use is yellow (255R/255G/0B). Yellow maps the t-shirt sleeves.
- The third color you use is magenta (255R/0G/255B). Magenta maps the collar and trim of the t-shirt.
Unfortunately, there is no "shortcut" to create the alpha channel, so you'll have to edit it directly.
Notice how each different color creates a different channel: red creates the red channel, yellow creates the green channel and magenta creates the blue channel.
The Tutorial
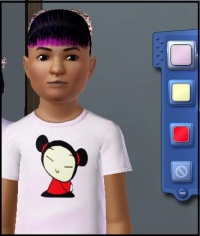
With this tutorial, I'm going to create the Pucca shirt pictured at the beginning of the tutorial. The shirt is going to have three color regions: the shirt as a whole, Pucca's face and Pucca's shirt.
I find the easiest way to create a mask is to simply draw on the base texture, so open up the base texture for your design in an imaging program. If you do not already have a base texture, follow the steps for extracting one below.
Extracting the Base Texture
Step 1
Open the CAS Texture Unitool (CTU).
Step 2
In the "Find A Mesh" tab, set the mesh details to the parameters of the mesh you wish to change the base texture of. Next choose the mesh you want to use from the drop down list. I'll be using the cfTopShirtTee mesh found under Child-Female-Top.
Step 3
Move over to the "Designs" tab and click "Add New Design".
Step 4
Under the "Other Details" sub-tab click the base texture key to highlight it.
Step 5
Being sure that the base texture key is highlighted, click on the "find" button at the bottom of the window.
Step 6
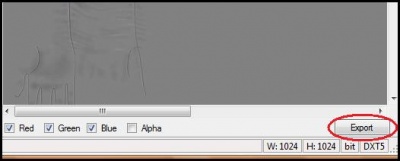
A DDS Preview window should pop up. Click the Export button at the bottom right corner of the preview window. Choose a destination for the file, give it a name, then save it.
Part I: Creating the Color Channels
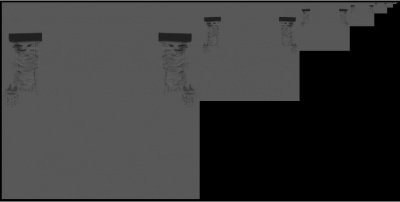
If you haven't already, open the base texture dds in your imaging program. If asked, load default sizes and do not generate MIPmaps.
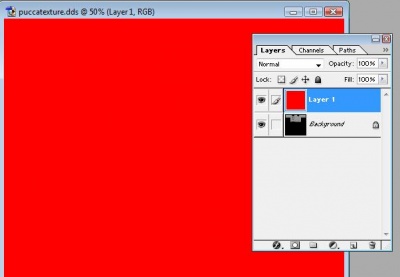
Note: If you get an image that looks like the one below, then you accidentally generated the MIPmaps. Close the file and reopen it, being sure to NOT LOAD MIPMAPS!
Note: Because Pucca has black outlines that I don't want recolored, I'm using a pre-made base texture with the outlines already drawn in. This is 100% optional and is only needed if you have a design that has prominent outlines or you wish to add parts that are non-recoloarble to your CAS part. To find out how to make new base textures see Creating A New Base Texture.
Each color region can be created with a certain color. As stated earlier: red creates the first color region, yellow creates the second and magenta creates the third. The CTU calls these "regions" patterns and they are named A, B, C and D according to their order. If your design only has one region then only follow the step for Pattern A. If your design has two regions, follow the step for Pattern A and B. And so on and so on.
Pattern A
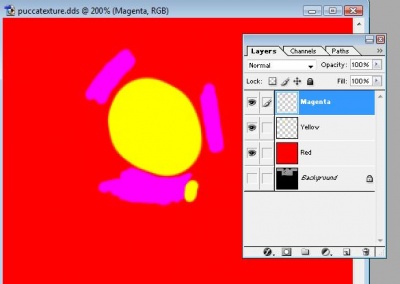
Create a new layer and fill it with red (255R/0G/0B). Just to keep things organized, give the new layer a name. I'm going to call mine "Red"...clever aren't I?
Note: With some imaging programs, you may have to make red either the background color or the foreground color before trying to fill the layer.
If your design has a second color region, then continue to Pattern B. If not, skip to Part II.
Pattern B
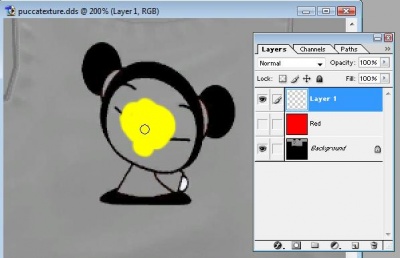
Hide the Red layer, then create a new layer, name this new layer "Yellow". Using yellow (255R/255G/0B) paint in the spots that you want as part of your second color region. I want Pucca's face and hand to be in one color region so I'm going to paint in those section with yellow. If you're filing in a design with pre-drawn outlines on the base texture (like me) then you do not have to be as meticulous with the coloring. In fact, coloring a bit onto the outlines helps insure a nice solid color/pattern region. Just make sure you don't go too crazy and color into another color region.
If your design has a third color region, then continue to Pattern C. If not, skip to Part II.
Pattern C
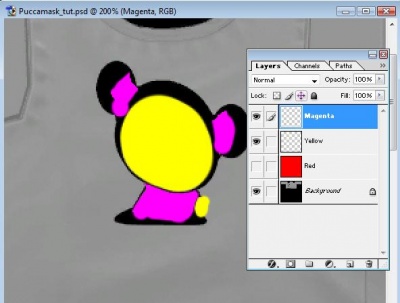
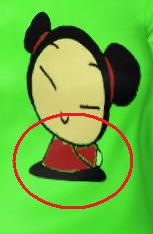
Once again create a new layer, this time name it "Magenta". Using magenta (255R/0G/255B) paint in the spots that you want as part of your third color region. This time I want Pucca's shirt and barrettes to be in their own color region, so I'm going to fill in those sections with magenta. Notice how I painted in the general area of the barrettes and shirt while still staying within the outlines, instead of trying to fill in the exact spot where the shirt/barrettes are located.
If your design has a fourth color region, then continue to Pattern D. If not, skip to Part II.
Pattern D
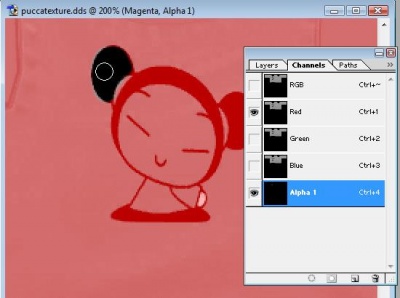
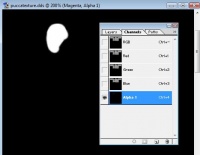
Theoretically, you can have a fourth color group as well. However, as stated earlier, there is no "shortcut" to make the alpha channel. So what you'll have to do is draw on the alpha channel itself.
- Hide all layers except for the base texture.
- Click on the channels tab
- Create a new channel, this will be your Alpha channel
- Hide two of the existing color channels, leaving only your new Alpha channel and one other color visible. For the sake of an example, I'm leaving red visible.
- Using white, paint over the areas that you want to be part of your fourth color group. (If your background color is set to white, you can use the eraser tool instead of the paint brush.)
- When you're done, hide the Red channel (or Green or Blue, depending on which one you kept hidden) and you'll see that the Alpha channel has been created successfully.
Just to reinforce the importance of painting in broad areas, this is what happens when you try too hard to stay in the lines.
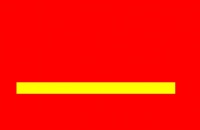
Even EA-made masks use large blocks/lines of color as you can see with these child ankle socks (pictured right).
How exact and precise you have to be really depends on what you're trying to do...so you may have to experiment with different techniques before you get it to look perfect.
Part II: Saving
Step 1
Hide the layer with the base texture and make the Red layer visible again. You should now have something similar to the mask shown in the example.
Saving Point
It's good practice to go ahead and save your file as a .PSD (or an .XCF if you're using GIMP), that way you can come back and edit the mask file easily if you messed up somewhere.
Step 2
Making sure that the base texture (and any other layers that are not part of the red/yellow/magenta layers) are hidden, flatten the image. If asked to discard any hidden layers, click Okay.
Step 3
Click on the Channels tab and flick through the Red, Green and Blue channels. If everything was done correctly you'll notice that all the channels have been made.
Note: Any unused channels should be left black.
